It would be so nice to have an input that when you type in, the suggestion panel show up for you to select. Autocomplete field is much better than a regular textbox field as well as a select drop down list. Let's see how to implement jQuery autocomplete in a .Net Core MVC project.
Note: Code can be downloaded at my Github.
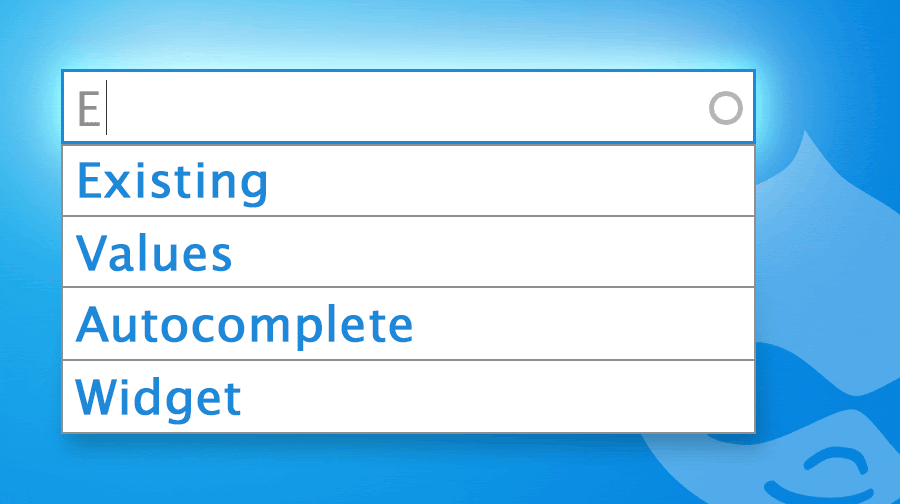
1. What is Autocomplete?
Autocomplete is a feature in which the application suggests/predicts the complete word a user is typing in a text box. This feature helps enhance user experience which is better than both a regular textbox or a select drop down list.
2. How to create jQuery Autocomplete in .Net Core MVC?
It's easy to create an Autocomplete field in .Net Core MVC project by using jQuery library. Let's see below steps to implement Autocomplete in .Net Core MVC.
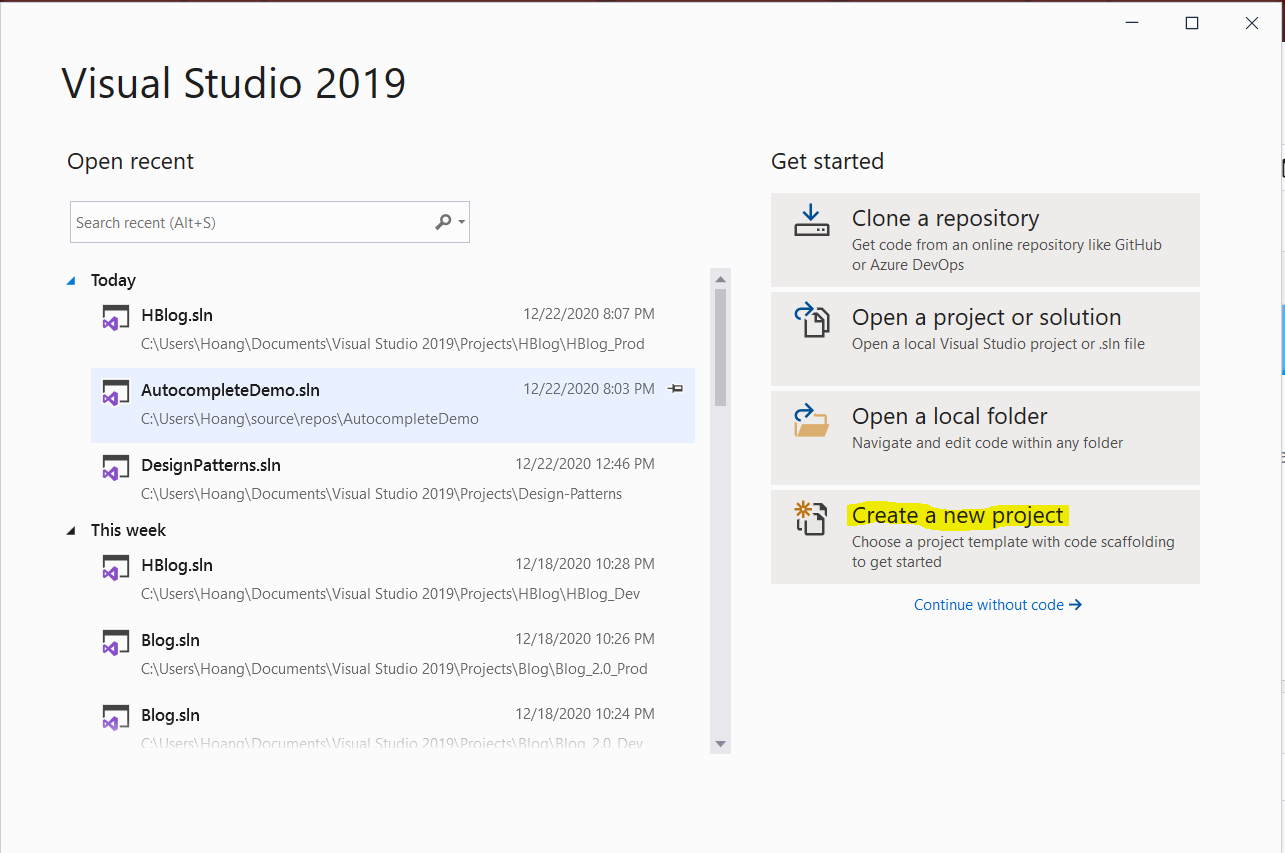
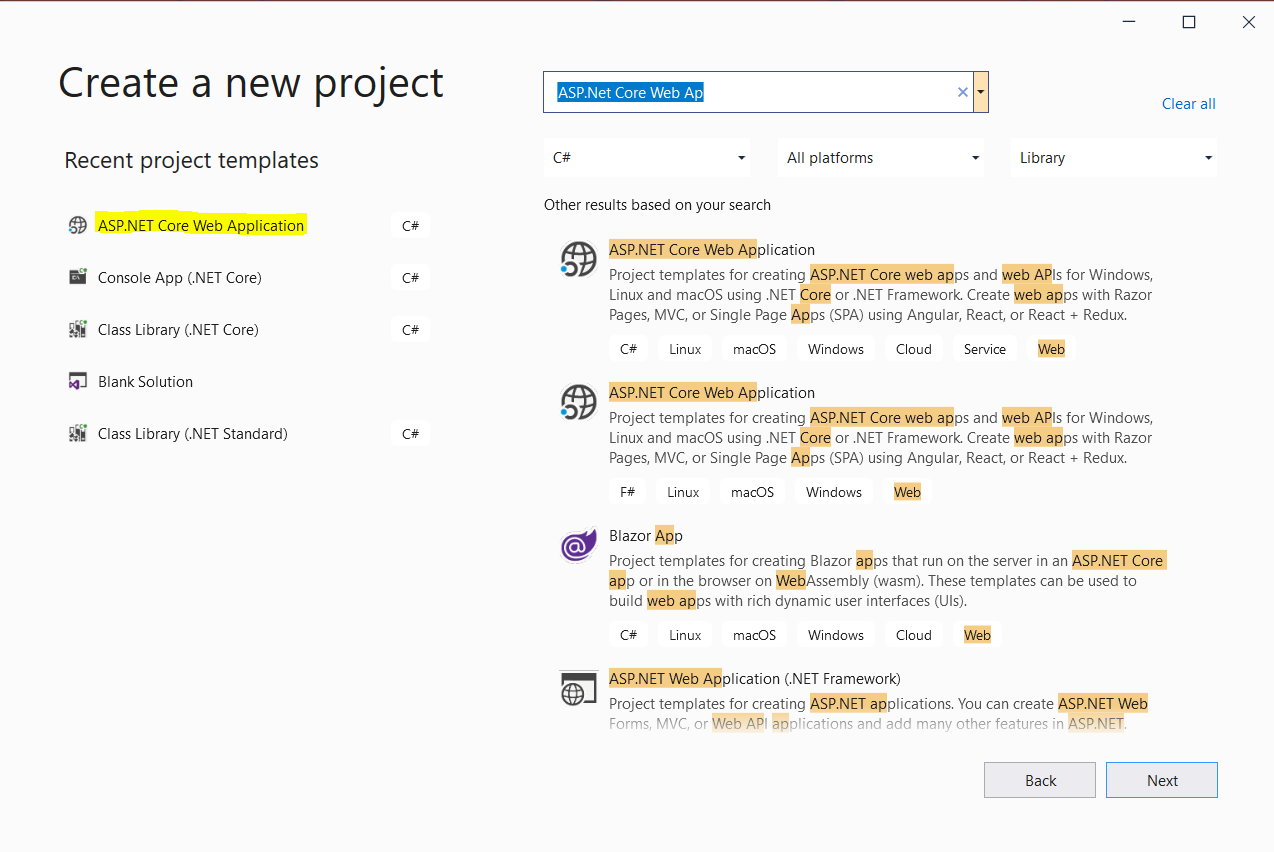
Step 1: Create an ASP.Net Core Web Application in Visual Studio 2019
Open Visual Studio 2019, click on Create a new project
Select ASP.Net Core Web Application, name it AutocompleteDemo
Step 2: Add jQuery library into Layout.cshtml
Add jQuery library in Layout.cshtml (blue highlight below)
In Layout.cshtml:
1 2 3 4 5 6 7 8 9 10 11 12 13 14 15 16 17 18 19 20 21 22 23 24 25 26 | <!DOCTYPE html><html><head> <meta charset="utf-8" /> <meta name="viewport" content="width=device-width, initial-scale=1.0" /> <title>@ViewData["Title"] - AutocompleteDemo</title> <link rel="stylesheet" href="~/lib/bootstrap/dist/css/bootstrap.css" /> <link rel="stylesheet" href="~/css/site.css" /> <link rel="stylesheet" href="https://code.jquery.com/ui/1.12.1/themes/base/jquery-ui.css"></head><body> <!--Omitted Code ...--> <script src="~/lib/jquery/dist/jquery.js"></script> <script src="~/lib/bootstrap/dist/js/bootstrap.js"></script> <script src="~/js/site.js" asp-append-version="true"></script> @RenderSection("Scripts", required: false)</body></html> |
Step 3: Add textboxes in Home/Index.cshtml
I added 3 textboxes here for 3 types of Autocomplete:
- Autocomplete with label only: The field will be filled by label by selecting from autocomplete panel.
- Autocomplete with id and label: The field will be filled by label and value will be populated from the selected id.
- Autocomplete with custom label: The label in autocomplete is customized to show more information.
In Home/Index.cshtml:
1 2 3 4 5 6 7 8 9 10 11 12 13 14 15 16 17 18 19 20 21 22 23 24 25 26 27 28 29 30 31 32 33 34 35 36 37 38 39 40 41 42 43 44 45 | @{ ViewData["Title"] = "Home Page";}<div style="padding-top:50px; padding-bottom: 50px;"> <div class="row"> <div class="col-lg-3"></div> <div class="col-lg-6"> <h2>1. Autocomplete with label only</h2> <div class="form-group"> <label class="control-label" for="users1">Users: </label><br /> <input class="form-control" id="users1"> </div> </div> <div class="col-lg-3"></div> </div> <div class="row"> <div class="col-lg-3"></div> <div class="col-lg-6"> <h2>2. Autocomplete with id and value</h2> <div class="form-group"> <label class="control-label" for="users2">Users: </label><br /> <input class="form-control" id="users2"> <label class="control-label" for="userid2">Selected UserID: </label><br /> <input class="form-control" id="userid2" /> </div> </div> <div class="col-lg-3"></div> </div> <div class="row"> <div class="col-lg-3"></div> <div class="col-lg-6"> <h2>3. Autocomplete with custom labels</h2> <div class="form-group"> <label class="control-label" for="users3">Users: </label><br /> <input class="form-control" id="users3"> <label class="control-label" for="userid3">Selected UserID: </label><br /> <input class="form-control" id="userid3" /> </div> </div> <div class="col-lg-3"></div> </div></div> |
Step 4: Get source data for Autocomplete fields
Create an UserViewModel class and UserController class to get source data for Autocomplete fields from back-end.
In Models/UserViewModel.cs
1 2 3 4 5 6 7 8 | public class UserViewModel{ public int ID { get; set; } public string Name { get; set; } public string EmailAddress { get; set; }} |
In Controllers/UserController.cs
1 2 3 4 5 6 7 8 9 10 11 12 13 14 15 16 17 18 19 20 21 22 23 24 25 26 27 28 29 30 31 32 33 | public class UserController : Controller{ [Produces("application/json")] public IActionResult SearchUserName(string term = null) { List<UserViewModel> users = GetUsers(); var result = users .Where(u => u.Name.ToLower().Contains(term.ToLower())) .Select(u => u.Name).ToList(); return Json(result); } [Produces("application/json")] public IActionResult SearchUser(string term = null) { List<UserViewModel> users = GetUsers(); var result = users .Where(u => u.Name.ToLower().Contains(term.ToLower())) .ToList(); return Json(result); } private static List<UserViewModel> GetUsers() { List<UserViewModel> users = new List<UserViewModel>(); users.Add(new UserViewModel() { ID = 1, Name = "Lucas Nguyen", EmailAddress = "lucas@lucasology.com" }); users.Add(new UserViewModel() { ID = 2, Name = "Eric Lu", EmailAddress = "eric@lucasology.com" }); users.Add(new UserViewModel() { ID = 3, Name = "Rachel Horseman", EmailAddress = "rachel@lucasology.com" }); return users; }} |
Step 5: Transform textboxes into Autocomplete fields by jQuery
To make textboxes Autocomplete fields, we need to call autocomplete function from jQuery library on the textboxes.
In Home/Index.cshtml:
1 2 3 4 5 6 7 8 9 10 11 12 13 14 15 16 17 18 19 20 21 22 23 24 25 26 27 28 29 30 31 32 33 34 35 36 37 38 39 40 41 42 43 44 45 46 47 48 49 50 51 52 53 54 55 56 57 58 59 60 61 62 63 64 65 66 | @section Scripts { @{await Html.RenderPartialAsync("_ValidationScriptsPartial");} <script type="text/javascript"> $('#users1').autocomplete({ source: '/User/SearchUserName/' + $('#users1').val() }); $('#users2').autocomplete({ source: function (request, response) { $.ajax({ url: '/User/SearchUser/', dataType: 'json', data: { term: $('#users2').val() }, success: function (data) { var result = $.map(data, function (item) { return { label: item.name, value: item.id }; }); return response(result); } }); }, select: function (event, ui) { event.preventDefault(); $('#users2').val(ui.item.label); $('#userid2').val(ui.item.value); } }); $('#users3').autocomplete({ source: function (request, response) { $.ajax({ url: '/User/SearchUser/', dataType: 'json', data: { term: $('#users3').val() }, success: function (data) { var result = $.map(data, function (item) { return { label: item.name, value: item.id, emailAddress: item.emailAddress }; }); return response(result); } }); }, select: function (event, ui) { event.preventDefault(); $('#users3').val(ui.item.label); $('#userid3').val(ui.item.value); }, create: function () { $(this).data('ui-autocomplete')._renderItem = function (ul, item) { return $('<li>') .append('<div id="ui-id-6" tabindex="-1" class="ui-menu-item-wrapper">' + item.label + '<br> <span style="font-size:smaller;">' + item.emailAddress + '</span></div>') .appendTo(ul); }; } }); </script>} |
3.Conclusion
Done, the autocomplete fields are implemented. You can learn more how to customize jQuery autocomplete fields by visiting their website. Please let me know if you have questions or just drop your thoughts into the comment section below!